Sunday 23 June 2013

Next up is a 1/35 diorama. A knocked out KVII and a german staff car. I have started the KV, it's the Trumpeter version. A good kit and goes together very easily. I have added a Lionroar etch set. I got this mainly for the gun barrel but as it was going cheap i've decided to use the main etchings. I will also be using Fruil metal tracks as Russian armour always benefits from sagging tracks.
The staff car is the new Tamiya Simca 5, just had to buy it. It's tiny and will look ridicules next to the Behemoth that is the KVII.
KV pictures to follow so in the mean time here are some pictures of the staff car. 1 hour 30 mins of model making gets you this.

Box art.

All the parts.

Ready for painting.

A clear modelling desk!


Friday 21 June 2013

Churchill Crocodile.
Last post for this one as it's finished! been a busy few days working on it and the base but it's ready for the competition. In the last update i had started the ground work and was starting the weathering on the tank. I used a lot of pigments and some very thin coats of acrylic paint to replicate the dust on the vehicle. The pigments used were a mix of earth tones and greys to give a different approach to the eventual outcome. I worked over the tank in several sittings and made light coats and then repeated myself until the desired effect was obtained. I sprayed very thin coats of light coloured paint over the pigment and then applied more pigments of a lighter colour to give a sense of dust layers. Metallic pigment was used for the track contact points, this works very well. easy to use and very effective.
Base work.
Small stones from the garden were placed at the bottom of the slope and a mixture of white glue and water was dripped over and allowed to dry. I followed this up with some washes to give some depth.
A mixture of 5 static grasses were added to give different colours to the grass areas and a few dried out pieces of moss were added to break up the scene. Once the tank was in place, i worked more pigment onto the ground work and sealed it with fixer. Last parts were to add the aerials, these are very thin wire painted black.

Base work.

Stones from the garden added and fixed in place with pva glue.

The finished article.

Note the layers of dust on the side of the tank and the tracks as well.

You can see the modulation style in this shot.


The finished trailer.

Monday 17 June 2013

Here is todays base work.
I made up a structure from plastic card, then filled it in with polystyrene. I then mixed up some plaster, sand and poster paint to colour it. Slap it on and push it around with spatula and a 1/2 inch paint brush. Looks ok. I do like adding small bases to my vehicles as it adds another dimension to my models. They certainly look better with some ground work.


Since my last Churchill post and my comment about it not being ready for the Club competition, i have done lots of work and it will be ready for the next club meeting!
There has been a lot of painting done. Filters and washes galore. Tracks fitted and detail parts added. The gasoline trailer is almost complete and only needs a small amount of weathering. The tank needs dusting and some dried mud applied. A base is under way as well. Hopefully the ground work will be finished in time but as long as the vehicle is ready, i will be happy.
Here are some progress shots.

Main components assembled for the camera.

Decals were kept to a minimum and as the front track shields are omitted and another few decals lost.

You can clearly see the modulation paint style to full effect in this shot.


Trailer almost complete.


Base frame work. Made using plastic card with corner strengtheners.

Tuesday 11 June 2013


Churchill Crocodile update.
I've managed quite a bit of progress in the last few evenings. Hatches are now in place, I've started the detail painting of the pioneer tools and finished the painting of the exhaust pipe. Tracks are about half way through painting. Not bad going, if i do say so myself. Got the impetus to finish this now.
I have added some filters to the trailer. I usually mixed up my own filters but this time i thought i'd try a ready mixed one. I bought the Sin Industries 'Allied filter set' and i'm not disappointed. Very good depth of colour and quick drying too. I used all 3 filters in the set to see the results. Green for light green, Brown for dark green and grey for bright green. That's a lot of green!
Here are some photo's of the progress so far.

Exhaust painted and fitted. I doubt very much it would be this rusty but i'm claiming artistic licence on this one.

Turret with hatches added.


Driver figure added. He came as a full figure in the kit but a bit of chopping and he's driving it now.

Where am i going?

Tools underway with detail painting.

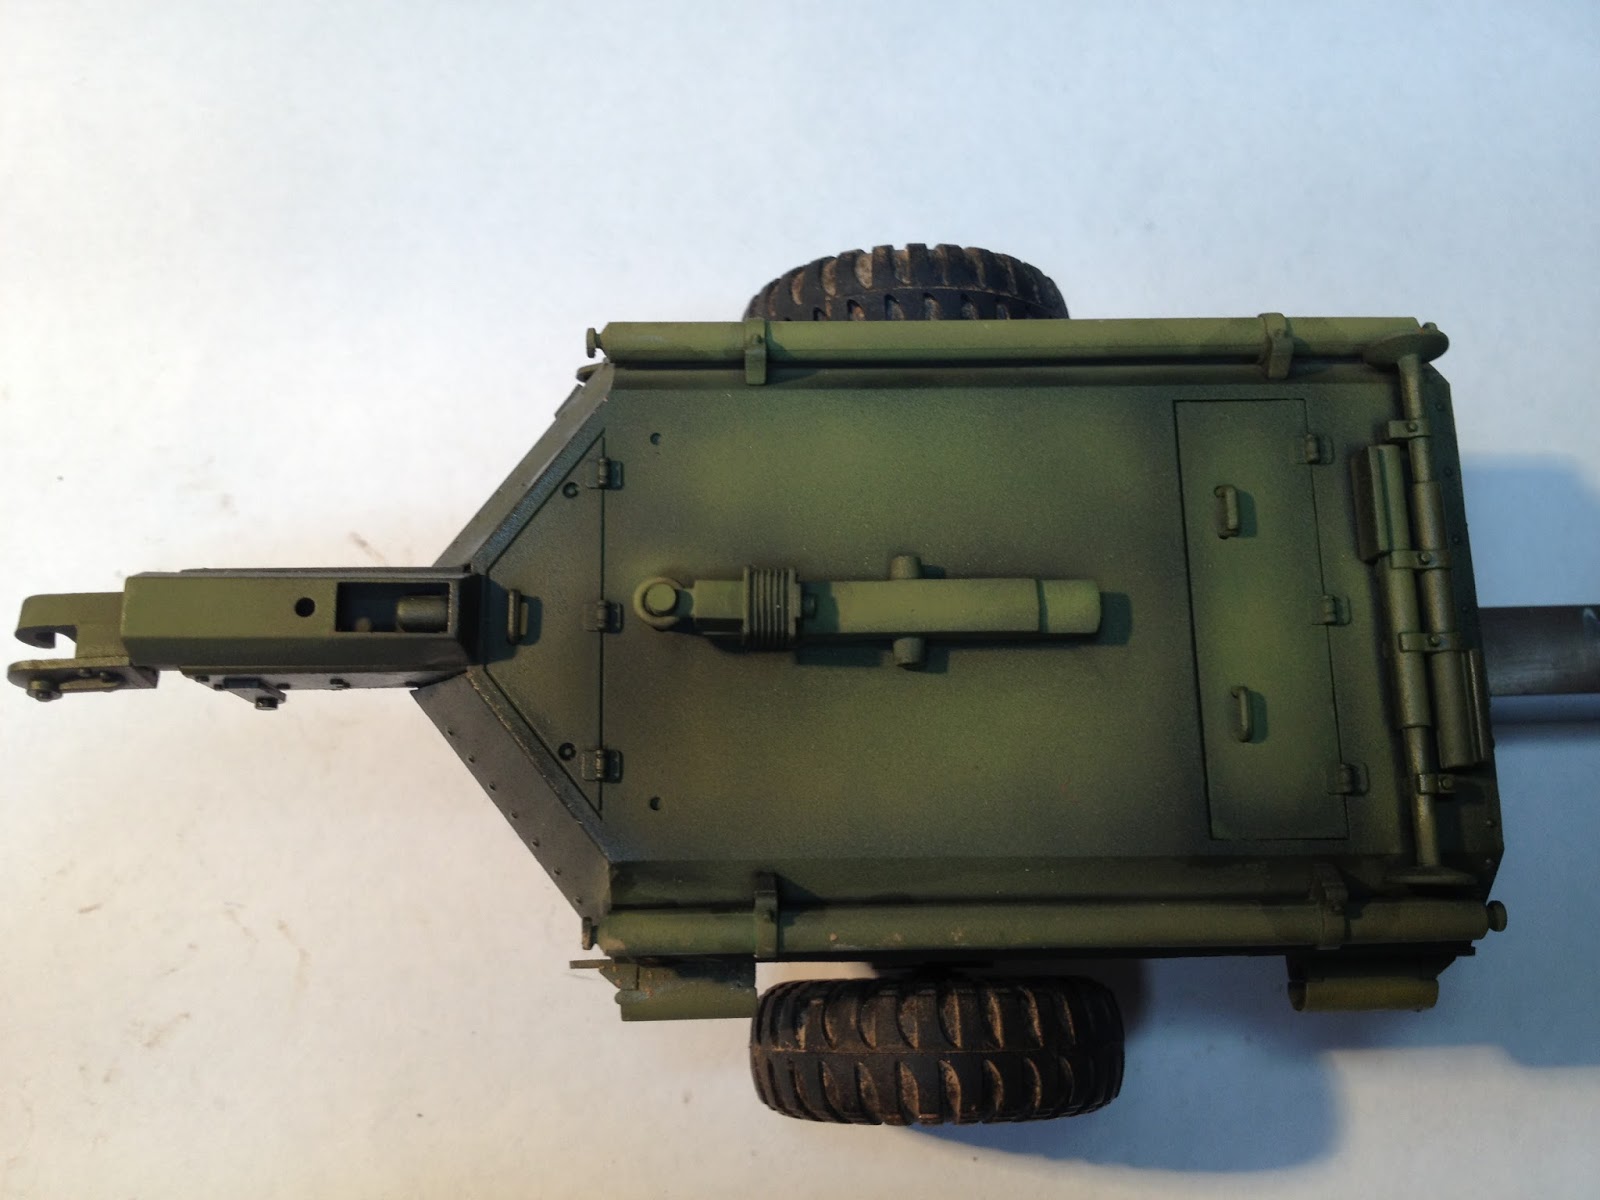
Trailer with first filter added.

Wheels for the trailer. Painted and the start of the weathering. 

Saturday 8 June 2013

Much calmer today. I found the main part that i was missing, however the turret hatch remains at large! i will make a new one from plastic card. I was hoping to have this model ready for a club competition on the 20th but the painting and weathering is a long way off finished so i am off to enjoy the sunshine.

Thursday 6 June 2013

Churchill update.
AAAAAGH! i've lost one of the hatches and a part from the hull. FFS! can't find them anywhere. Guess the model room is getting a gutting this weekend.
I started fitting some parts onto the hull and turret and to my dismay there are parts missing. Can't believe they've just vanished. Will continue with detail painting until Saturday's big clean and find expedition. Until then...

Sunday 2 June 2013

Ok time for some more paint. Following on from the darker greens, i have now added the highlights.
I mixed Olive drab, dark green and yellow green. Spraying progressively lighter shades by adding more of the yellow green, this colour isn't as harsh as white and gives a softer hue to the mixture. I have also sprayed the hatches and cupola and tool clasps. In keeping the these pieces separate and spraying at another time, the mixture of paint will be slightly altered from the original paint batch. This will give yet another variation to the colours on the model. Next will be a bit of tidying up some parts with an overcoat of thinned olive drab/dark green, then satin varnish will be sprayed over the entire model to protect all the hard work done so far and as a base layer for the decals.

Black undercoat for deep shadows.

Green coats applied.

Turret with highlights. Note the front upper plate is lighter than the hatch plate.

Darker tones on the side of the turret add a depth to the green and shadows.

Hull with highlights added. You can see the multi layers of paint and the myriad of colours.

Hull side shot.

Hull frontal plates, again with the highlights added.