Friday 20 September 2013

Here is the finished M20. Very pleased with this one as i did this, start to finish in two and a half weeks. A personal best i think. Sorry i've missed a few of the last stages out but i was on a deadline to finish for IPMS Edinburgh competition (see link to the club blog for photos of all the entries)
Weathered with washes and filters. pigments mixed with plaster and resin for the mud effects then once dry i added some pigments over the plaster mixture using different colours to add tones and a more realistic finish. Stowage items are form the spares box. Italeri, Tamiya, Legend and Blast models items all helped to bring the model to life. I paid particular attention to the painting of these items to enhance the model and i am delighted with the outcome and will spend more time from now on with the smaller items of a model as i now see the benefits of extra painting time. I used some ship rigging line for the ropes and tie downs. It comes white but i stained it in cold tea to give a hemp look to it.


Stowage with the home made tarpaulin and German water can with added souvenir  helmet.


rear deck items added and lashed down.


Tuesday 17 September 2013

M20 update.

I have now sprayed on the highlights and a few lowlights. In my haste to get this finished i forgot to photograph it at this stage. However i have photographed it half way through a dark wash to see the difference it makes to the model. I used Mig dark brown wash straight from the bottle as i had let the highlights/modulated colours become very light, in fact i thought i had over done it. The dark wash was perfect and the results speak for themselves. When the wash had dried, i dampened a brush with thinners for washes and made downward strokes on the panels to simulate rain and dirt streaks.
Wheels have received a coat of NATO black and then had a diluted wash of Tamiya buff added in several coats to give a dusty look to the tyre walls before adding pigments. The interior mask has also been removed. Detail painting is next and painting of the stowage items as well. More soon!

First diluted buff wash added.

adding the wash colour.

You can clearly see the effect the wash is having on the colours.

Left is the olive drab and right with the wash added.

Wash added.

rear view with wash done.

Looking good now the mask has been removed.


Monday 16 September 2013

I promised you more soon so here it is.
Having undercoated the M20 in Halfords automotive grey primer, which in my haste, i forgot to photograph. I then proceeded to put on the first coat of olive drab. For this i used vallejo model air olive drab No.71043. I will use this as the base colour and lighten, darken the colour appropriately.
There has been a lot written in books and online about Olive Drab and what constitutes the correct shade and which brand of paint is the most accurate but in my opinion it's up to the person painting. If it looks right to you then that's all that matters. I like Vallejo air as it's pre thinned and i like Tamiya as well. I use both to give a slight variation in colour.
Here is a couple of shots of the base colour on. I had previously sprayed the wheels in black. Olive drab has been sprayed onto the hubs and i will now proceed with the detail painting of the wheels. fitting will take place at the final stages and then the guards will be added. This way i can give the wheels my full attention and try and get the look i'm aiming for.

Olive drab first coat.

The masking doing it's job!

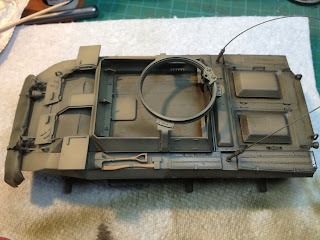
Continuing on with the M20. After finishing off the interior, it was time to close it up and mask off, ready for exterior work and undercoating. I'm looking to achieve a lived in look for this project so there will be lots of crew stowage added. First up is a home made tarpaulin. I rolled out a blob of Milliput and then covered it in a piece of foil. The foil is from the top of a butter carton. It's not got any pattern on it, thin and malleable and best of all...Free! i added a couple of masking tape straps and tied it on to the brush guards and finally pressed it to conform to the plate of the M20. I have added the aerials from stretched sprue and glued them on with liquid poly. I used to add the ariels last but gluing was a problem. this time by using the liquid poly, it has melted them on giving a strong bond, less likely to break or fall off due to the tiny spot of glue i have used in the past as i try not to ruin the paint already applied. More soon.

Top plates added and masked off for painting.


Milliput sausage and foil.

wrapped up.

Fitted onto the front.

Exterior fittings in place.

All exterior fittings added and two whip ariels made from stretched sprue. These will be tied down to the rear later in the project.


Sunday 15 September 2013

Hi, It's been a while since i posted anything but i haven't been idle. Still working on the KVII diorama and i now have the tank undercoated, tracks complete. Painting will start soon. I have a club competition on this coming Thursday and i knew that i wouldn't get the dio finished so i've went for a quick build.
Here it is so far, Tamiya's M20. Nice little kit. It's a few years old now but it is still a great model and subject. I got this by swapping with someone in my local club, good call!
Simple build as with most Tamiya kits. I added some wiring to the sides of the interior walls, quick and easy job and gives a better look to the insides. Under coat from a rattle can then detail painting can begin. The floor is painted olive drab as it could be seen from the air and a white floor would make a good target. walls are painted in white with some sand added to tone down the brightness. I applied some washes to the whole of the interior and a light dry brush followed. Once everything was dry i added a mixture of pigments to dirty and dust up everything up.
I would assume with an open fighting compartment it would be fairly dusty and with crew boots bring in mud it would be quite dirty.
I then closed everything up and masked off to prevent any overspray later on.


Box art.

interior with added wiring.

undercoat applied.

Nearly there.


There are a few details to be added later on such as weapons, crew stowage but i will add these once the painting is finished and drop them in at the end.